July 05, 2017
How to Make a Balloon Arch in 9 Easy Steps
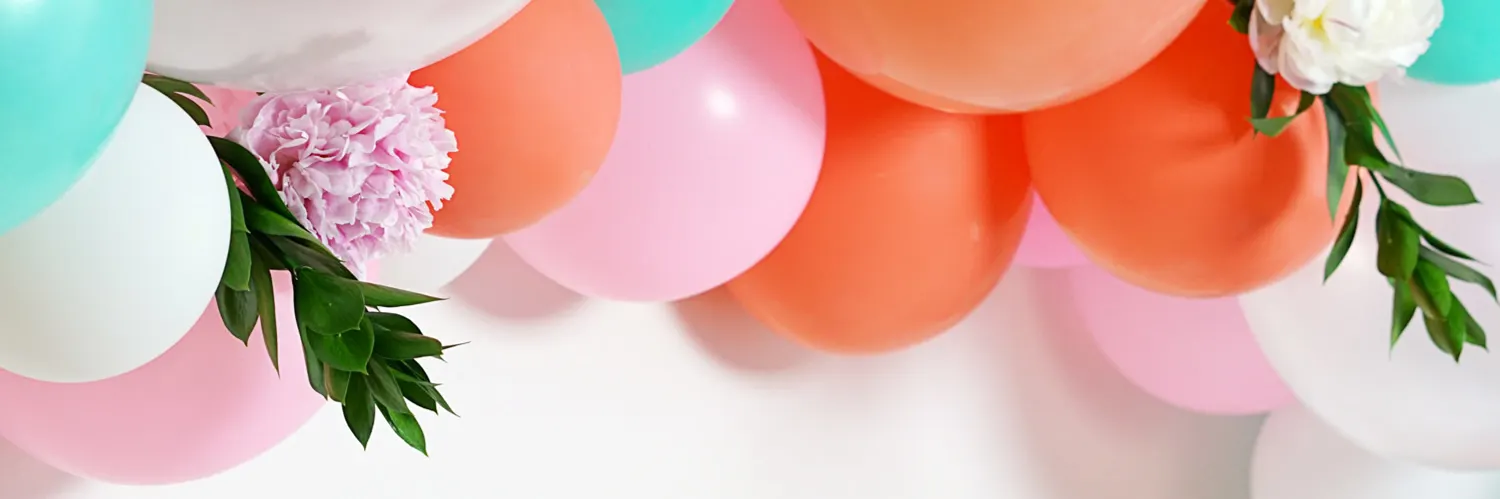

Looking for a decor element to take your next celebration over the top? Whether you’re hosting a birthday party, welcoming a new baby, celebrating a bridal shower or hosting a dinner party, a DIY balloon arch is just what your party needs.
At first glance this do-it-yourself may seem daunting, but don’t let the “wow” factor discourage you from creating one. We have you covered with everything you need to know about how to make a balloon arch, including a detailed supply list and step-by-step guide to help walk you through the process.
Shop Best Selling Flowers
Balloon arches are a trendy party decoration that are here to stay. It’s time you dress up your party without emptying your pockets! Before jumping in, take a peek at the materials you’ll need to get started below.
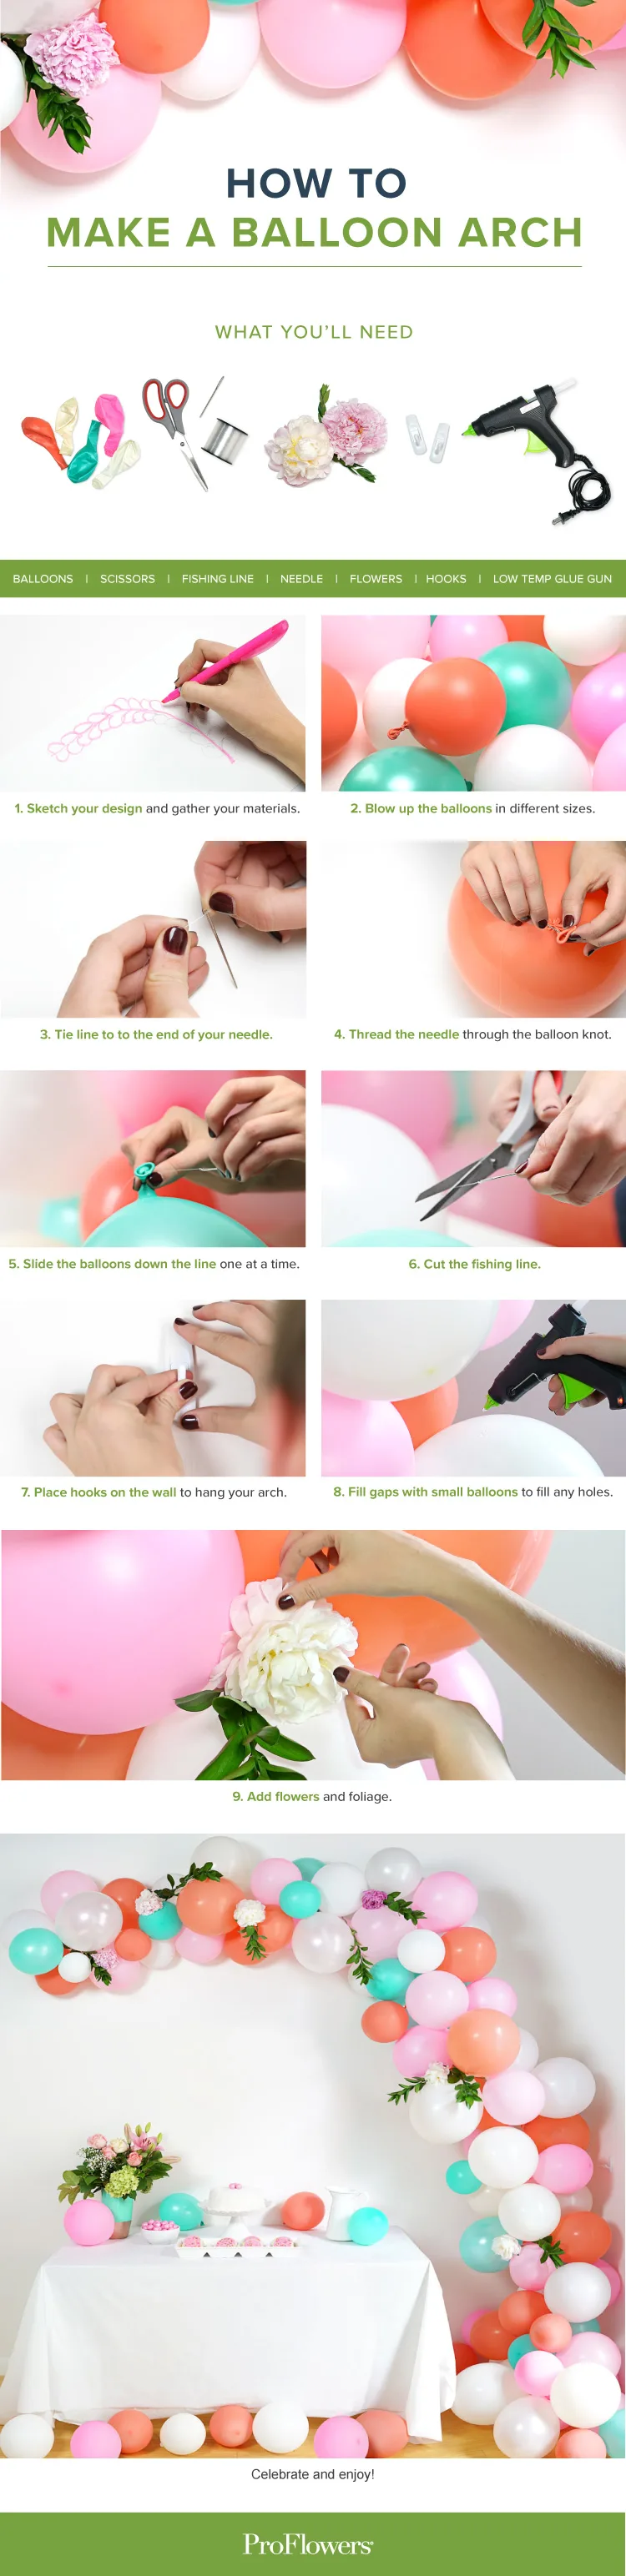
DIY Balloon Arch Materials
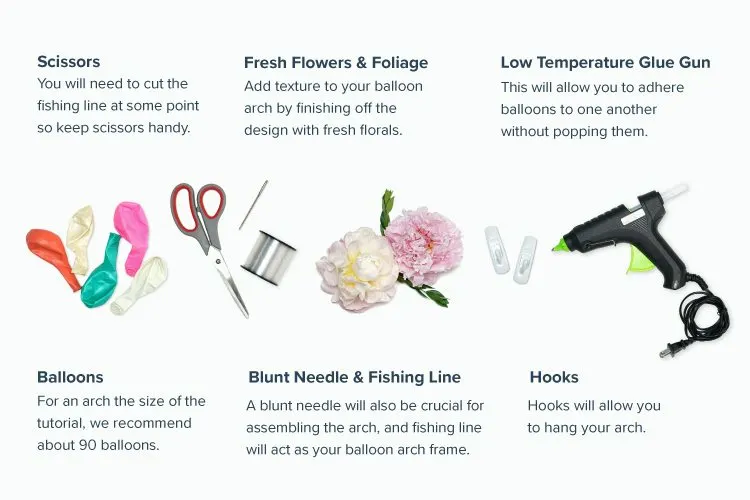
Balloons– Have fun picking out different colors and consider adding patterned balloons to your design!
Balloon Pump– While this isn’t necessary, a balloon pump will speed up the process and make things a lot easier on you.
Fishing Line– Fishing line will act as your balloon arch frame. A roll of any size should do the trick. Be sure to get the clear fishing line so that you can’t see it once your arch is assembled.
Blunt Needle– Use a blunt needle to string the balloons together. It makes the process safer so you won’t prick your finger!
Low Temperature Glue Gun– Fill out the arch by gluing on extra balloons.
Fresh Flowers and Foliage– These will add a natural touch that is sure to impress your guests.
Hooks– Use sticky hooks or metal hooks with a hammer and nails if you’re not worried about ruining the area where you are hanging the final product.
Scissors– Cutting the fishing line will be essential for getting your arch hung and admiring your final product. Keep some handy!
Clear Shipping Tape– It’s better to be safe than sorry. Clear shipping tape will make for an easy fix if something goes wrong.
How to Make a Balloon Arch
Project Time: 1 – 2 hours
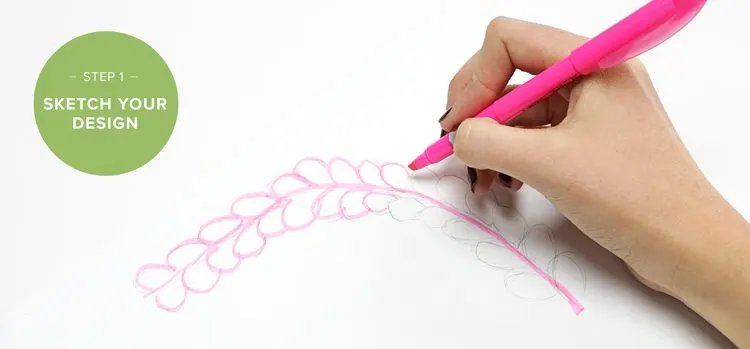
Step 1: Sketch your design and gather your materials.
Your illustration doesn’t need to be too intricate. Having an idea of the general shape you want your arch to take on will help you when assembling it.
Pro Tip: Your arch doesn’t necessarily need to take on a traditional arch formation. Have fun creating a unique shape like an incomplete arch or a garland that climbs the wall.
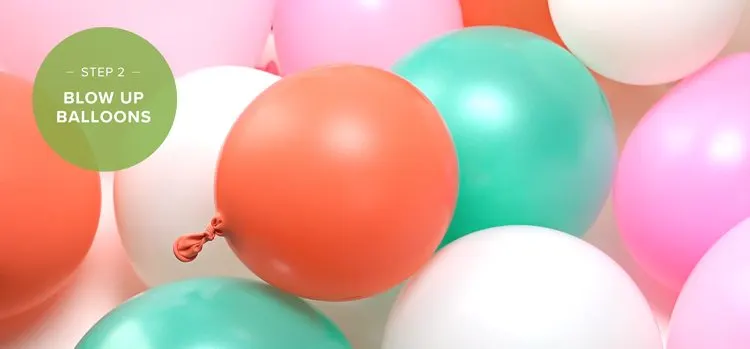
Step 2: Blow up the balloons.
To give your arch variety, blow your balloons up at different sizes. You should also consider the color palette you’re working with and how you’ll vary each balloon when assembling. You can create your arch to feature a different color every balloon or create small clusters of colors for a more cohesive look.
Pro Tip: Make sure to blow up some extra small balloons for filling in the spaces of the arch once you put it up.
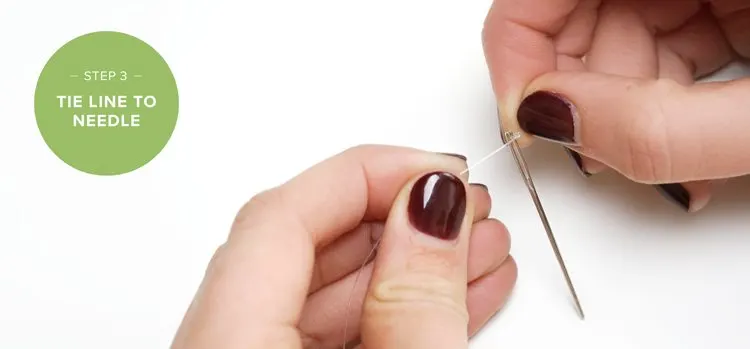
Step 3: Tie the fishing line to the end of your needle.
We recommend a traditional knot. Depending on the size of your fishing line, you may have to knot the line a few times to ensure that it’s secure.
Pro Tip: Use more advanced knot tying techniques to really make sure your line isn’t going anywhere.
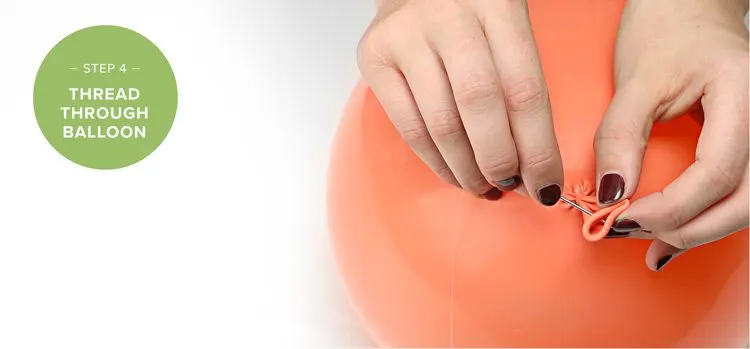
Step 4: Thread your needle through the knot of an inflated balloon.
Keep your fingers to one side of the knot and be careful when pushing the needle through to avoid pricking your finger.
Pro Tip: Use a thimble as the knot of the balloons may be thicker then you think. A thimble will allow you to use extra force to push the needle through all while avoiding any injuries.
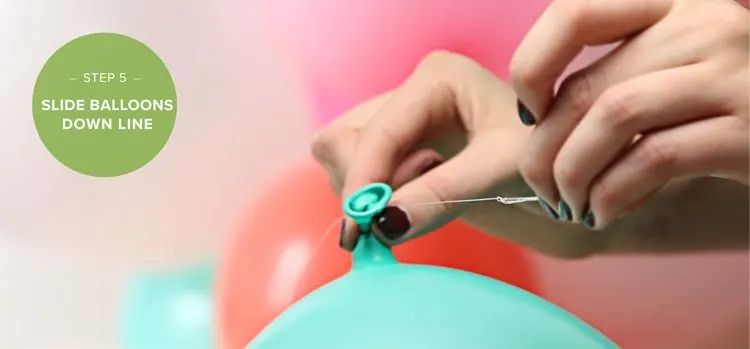
Step 5: Once threaded, slide each of the balloons all the way down the line one at a time.
Repeat this step until your garland is as long as you’d like it to be.
Pro Tip: Vary your balloons in color and size as you add them to the line.
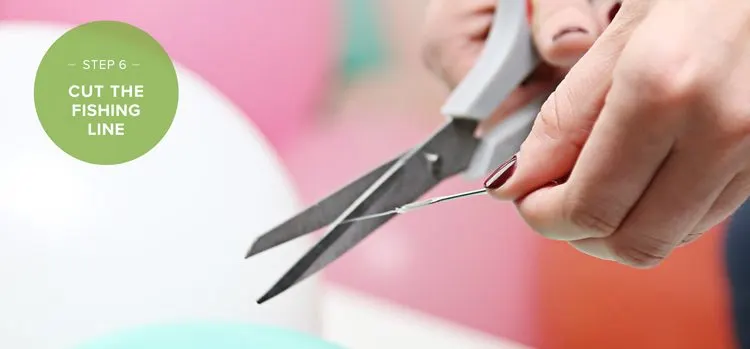
Step 6: Cut the end of the fishing line.
Be sure that you tie a knot at the end of the fishing line after cutting it so that your balloons stay put. We recommend using the same knot technique as you did above.
Pro Tip: Double check that your balloon arch is going to be the right size before cutting the fishing line.
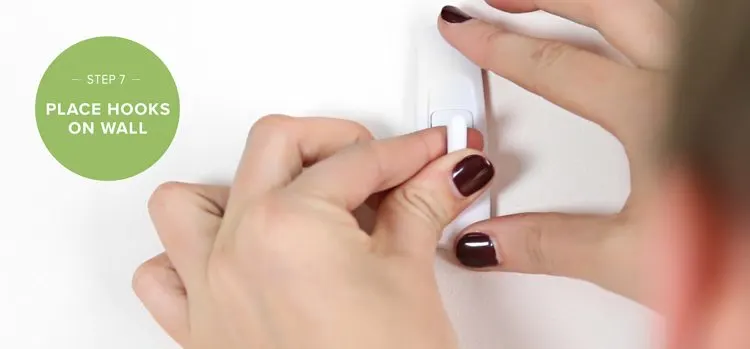
Step 7: Now, it’s time to put your arch up.
Lay out the frame of the arch by adhering your hooks or nails to the wall or area where you are hanging it. Be sure to hang your hooks or nails in the shape you wish your arch to have.
Pro Tip: Put the arch up in sections, clearing a free space of fishing line to attach to the hooks or nails. Once you have attached a section of the fishing line, you can then move the balloons back down the line closer together to make the space fuller. This will simultaneously free up a space for the next section to hang.
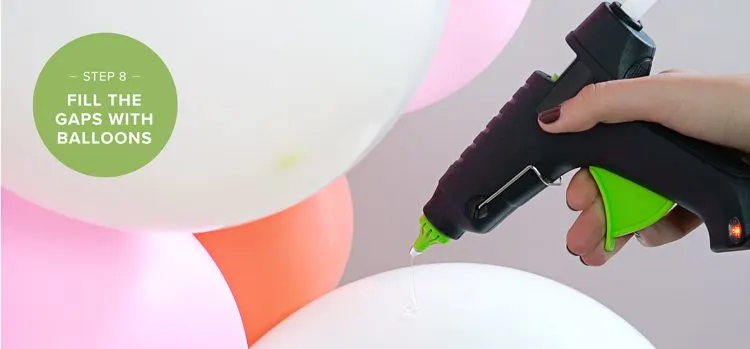
Step 8: Using your low temperature glue gun, create a fuller arch and fill in any holes with smaller balloons.
The main reason to use a low temperature glue gun is to avoid popping balloons. Even with a low temp gun, the metal tip of the gun will get pretty hot. Avoid touching the tip of the gun directly to the balloon as it might pop.
Pro Tip: Hover the glue gun above the balloon to add a drop of adhesive.
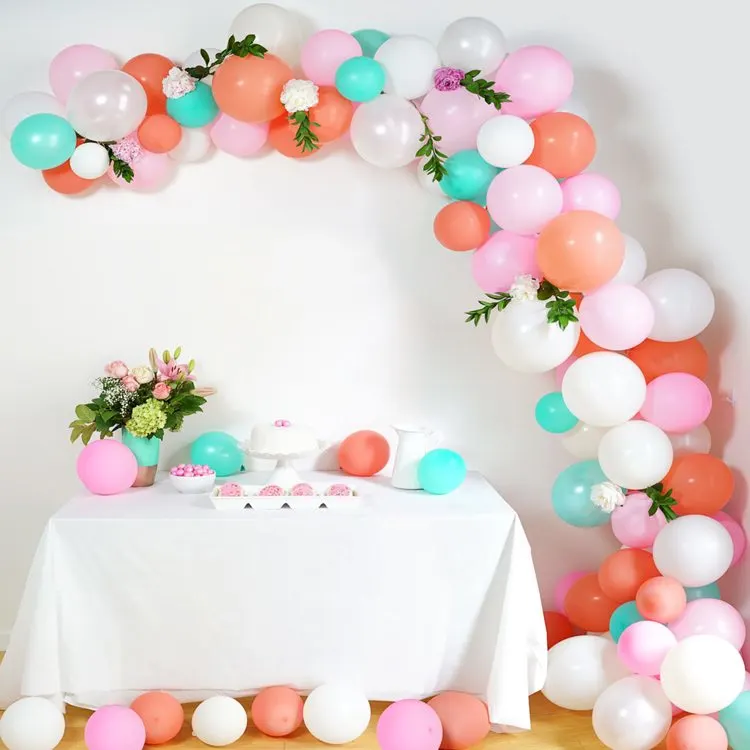
Step 9: Finish off your balloon arch with some optional foliage and fresh flowers.
This will give your arch more texture as well as a natural feel. You can also opt for other add-in’s for whatever style celebration you are looking to achieve.
Pro Tip: Tropical flowers or palm fronds are perfect for a summer themed celebration or add in balloon animals for a kid’s birthday party!
Now that you’ve created your own balloon arch, it’s time to celebrate and enjoy. Keep in mind that there are plenty of ways to showcase your arch especially since it should last up to one week. We decided to highlight ours with a dessert table underneath complete with sweet treats and beautiful florals although, you don’t have to keep your decor near the snacks. We’ve listed a few tips below to help you decide how you’ll showcase your masterpiece.
Above the dining table.
Near a fireplace.
Above the entryway.
Near the gift table.
As a photobooth backdrop.
How to Make a Balloon Arch Step-by-Step
You can find our complete step-by-step guide for how to make a balloon arch below, print it out, share it with friends or save it for a later project. Create a statement decor piece without all the hassle!
With our guide, you can feel confident about hosting a get-together that is sure to impress. No matter if you’re celebrating one of life’s little moments or something more formal, a DIY balloon arch is a great way to make a big impact with your décor.
And the best part is, it doesn’t have to be perfect. It’s really all about making something one-of-a-kind. Have fun picking out the colors for your balloon arch and other extras, like fresh flowers, to really make your arch pop (just not literally…). For more DIY decorating tips check out our flower chandelier tutorial.
Roll up your sleeves and have fun creating a conversational piece for your next bash!